Wednesday 30 March 2011

SHADE LOVING FRUIT AND NUTS


Click here for the 'Seeds of Eaden' seed shop

There are plants available that will thrive in problem areas of your garden. If you wish to grow fruit and nuts in a shady part of your garden then it is a case of carefully selecting the right varieties of plant that will tolerate and enjoy these conditions. It is often better to work with nature than fight against it.

All plants require sunlight to grow, but some plants are more tolerant of shade than others.  Fruiting plants that naturally grow in shady areas tend to be woodland plants, as they are shaded by the tree canopy during the summer.  They include blackberries, blueberries, gooseberries, raspberries, rhubarb, tayberries and toysenberries. Alpine strawberries will tolerate more shade than other strawberries, although they do require some sun to fruit.

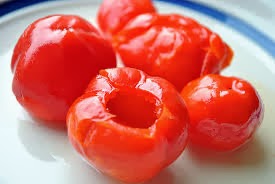
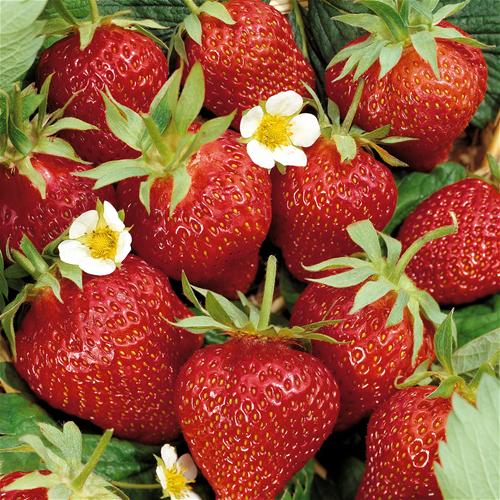
One advantage of a shady area is that the ground is likely to stay moist.  The increased dampness of the soil and  slow ripening can help to plump up the fruits before they ripen and are harvested. This gives them a delicious taste.

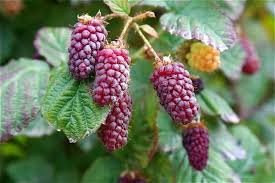
If your plot receives sun in the morning than nut trees such as filbert and hazelnut will be successful. Fruit trees growing in light shade will produce a lower fruit yield but will generally grow well. Sun loving fruit trees growing in deep shade will be prone to pest and diseases and will return a low fruit yield.


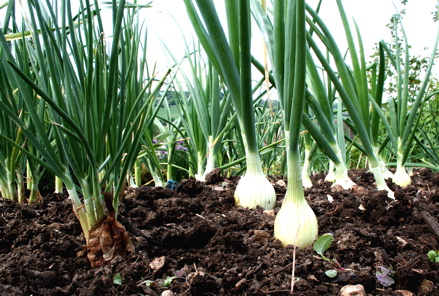
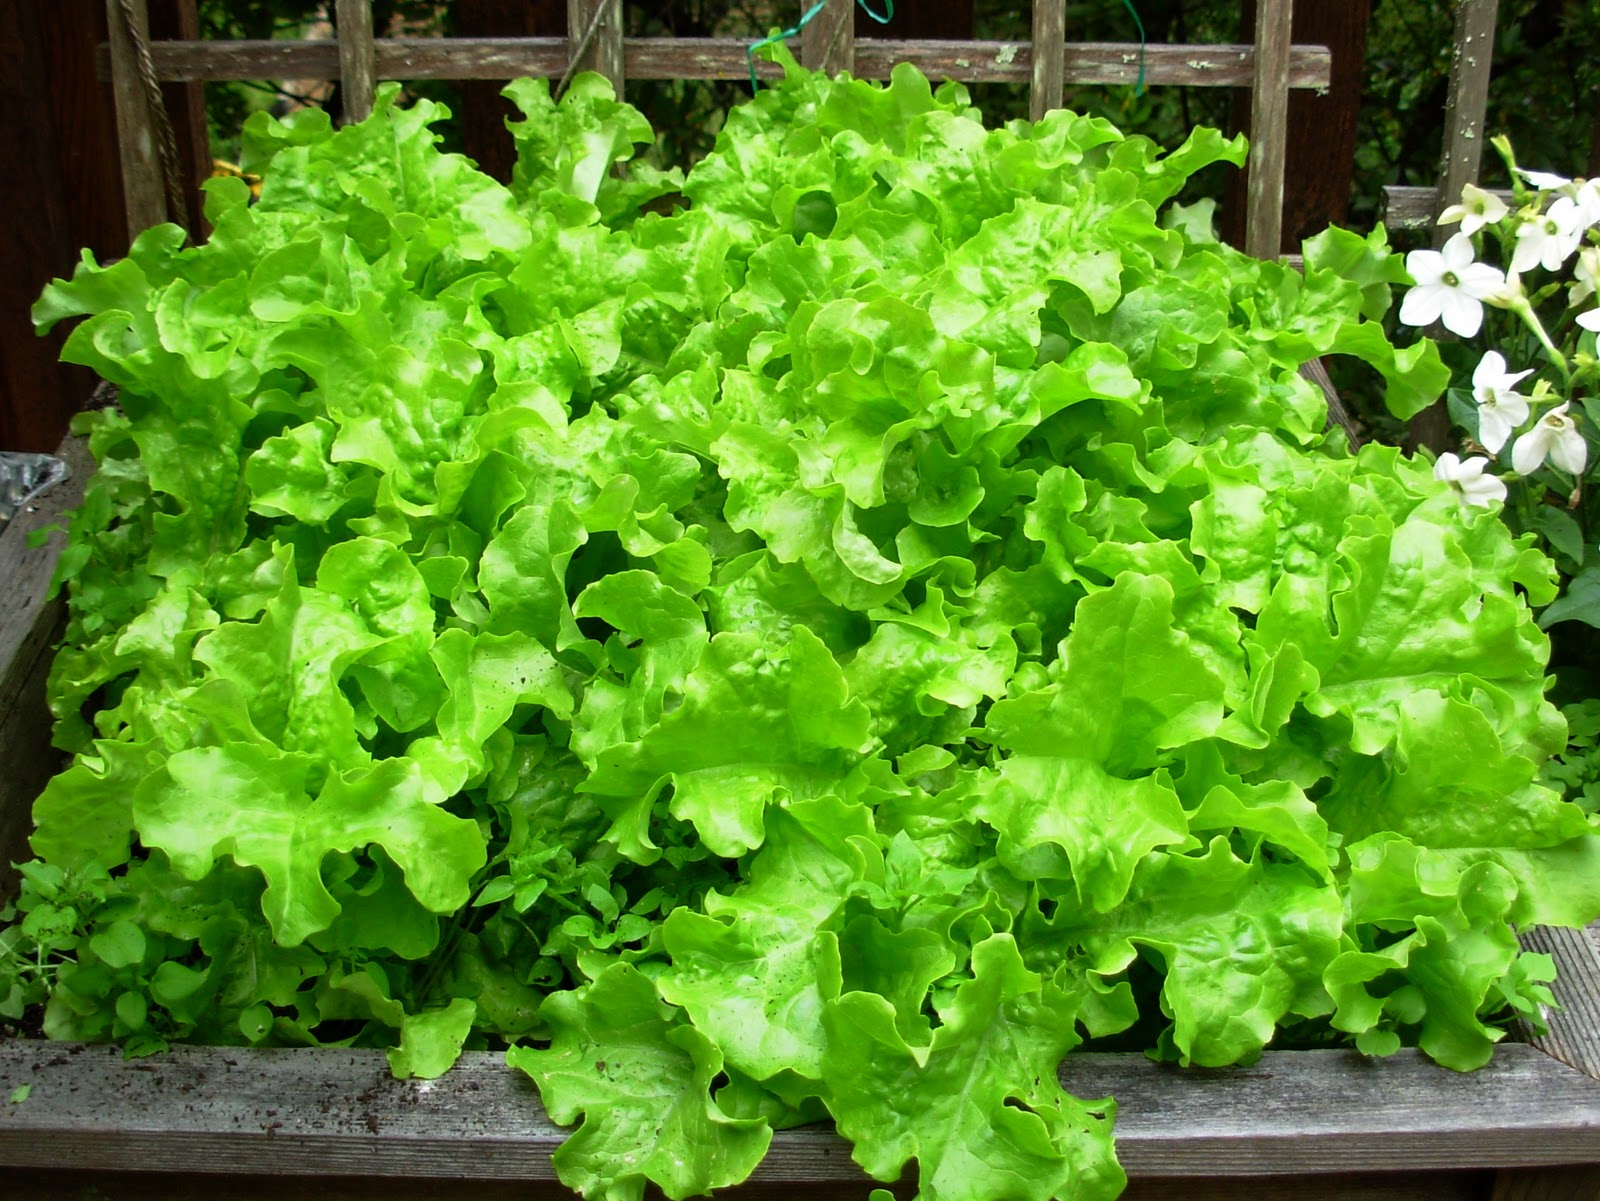
A shady area will mean that you have a reduced need to water, and crops that can bolt will be more successful. However, all plants require light to grow so a heavily shaded area will be problematic for growing crops. Crops grown for leaves, stems or buds actually benefit from some shade. Leafy vegetables such as salad crops and some herbs do better in shade than fruiting plants. 

 
Mushrooms can be successfully grown in shade.  These can be grown on inoculated timber or mulch. Mushroom spores can be bought as plugs that can be placed into drilled holes on a log.  Ensure that the log is hard wood variety and seasoned timber. Varieties include oyster, white button, chestnut and shitake.

You could address heavily shaded areas by pruning this area if shade is caused by overhanging trees.  Seeds can also be given a head start by germinating them indoors and transplanting the young plants into the ground when they have a well established root system, giving them an advantage over seeds placed directly into the soil.


For related articles click onto:
What is a potager?
What is a vegetable?
What is the difference between a currant, raisin and a sultana?
What is the difference between a marrow and a courgette?
What is the difference between a peach and a nectarine?What is the difference between a squash, pumpkin and a gourd?
What is the difference between a turnip and a swede?
What is the difference between a yam and a sweet potato?
What is the difference between a vegetable and a fruit?
Tree size
Vegetable crop rotation
Weeding

Why don't seedless grapes have seeds?

Monday 28 March 2011

RECIPE FOR ITALIAN TOMATO SAUCE


Click here for the 'Seeds of Eaden' seed shop


Impress your friends with this Italian dish. This tomato sauce is made from a traditional Italian recipe and is simple to make.  It tastes delicious and works perfectly with pasta dishes.


The secret to great sauce is to use the freshest, top quality ingredients.  Use fresh herbs where possible, and prepare ingredients just prior to cooking to retain their flavour.  Having a small amount of herbs growing in your allotment or on your kitchen windowsill will give you a head start.


Ingredients
1 kg small variety tomatoes
1 large onion
4 cloves Garlic
1 teaspoon chopped Rosemary
1 teaspoon chopped Basil
Salt
Pepper
2 tablespoons plain Olive oil
1 glass red wine


Place the tomatoes in the oven and roast them for 35 minutes (this enhances the flavour). Bring a pan of water to the boil.  Place the roasted tomatoes into a sieve and  lower into the pan for a minute in order to remove the peel.


Chop the onion and garlic and place into another pan along with the olive oil. Gently heat for 5 minutes.

Place the peeled tomatoes into a saucepan and simmer for 5-10 minutes.  Mash the tomatoes with a potato masher and place in sieve to remove any excess water. Place the tomatoes in the saucepan containing the onion and garlic and add the red wine. Chop the herbs and add to the tomatoes. Simmer for 10 minutes.


Season with salt and pepper. All ready to serve on your delicious pasta. Perfect.


For related articles click on the links below:
care
Artichokes Alla Romana
Butternut squash with leek and stilton
Chicken fried rice
Chicken stir fry
Chicken supreme
Recipe for Asparagus Quiche
Recipe for cauliflower cheese
Recipe for home made olive bread
Recipe for Italian pizza
Recipe for Italian tomato sauce
Recipe for lasagna
Recipe for pea salad with mint
Recipe for pickled cucumber
Recipe for Plum Chutney
Recipe for Salmon with lemon and herbs
Recipe Spaghetti bolognese
Recipe for spinach and broccoli fritatta

Recipe for tomato soup
Vegetarian recipes - vegetable fried rice

Saturday 26 March 2011

HOW TO GROW PEPPADEW PEPPERS FROM SEED


Peppadew peppers have a distinctive flavour, combining peppery and sweet sensations.  Peppadew is a trademark name for processed sweet piquante pepper, with the distribution of plant material is strictly controlled by the owners. Applications have been made by the Peppadew company to The International Union for the Protection of New Varieties of Plants, otherwise known as the UPOV.


Seeds can be sown indoors in January to give the plants a head start before planting outside.Alternatively they can be sown in a greenhouse up until the end of march.  

Fill plug trays with John Innes 'seed' compost. Cover with 2 cm of  compost and water gently.  Place in a well lit place, ideally a south facing windowsill with between 12-16 hours sunshine per day, remembering to keep moist during germination.  Ensure there is adequate ventilation to your seedlings.


Germination will take 1-4 weeks. They can be transplanted into individual pots until they are ready to be planted outside. This can be carried out when  the seedlings have produced their fourth leaf. 

Fill 9cm pots with either John Innes no.1 or no.2 potting compost, carefully remove them with a pencil and gently transplant to their individual pots.  When the threat of frost is over they can be planted directly outside or placed into a greenhouse. Ensure plenty of organic matter is incorporated into the soil to keep the roots moist. Place in a sunny position.

For related articles click onto:
Growing herbs
Growing rhubarb
Growing potatoes
Growing tomatoes
Growing tomatoes from seed
Harvesting potatoes
How to grow broccoli from seed
How to grow cauliflower from seed
How to grow garlic
How to build a cold frame
How to grow artichokes from seed
How to Grow Asparagus from Seed
How to grow cabbage from seed
How to grow carrots from seed
How to grow cucumbers from seed
How to grow french beans from seed
How to grow lettuce from seed
How to grow onions from onion sets
How to grow onions from seed
How to Grow Pumpkins from Seed
How to grow runner beans from seed
How to grow seeds indoors
How to grow strawberries from seed
How to grow tomatoes from seed
How to make compost
How to propagate using division
How to propagate from seed

Tuesday 22 March 2011

HOW TO GROW ONIONS FROM ONION SETS


Click here for the 'Seeds of Eaden' seed shop

Onions can be grown either from seed or from onion sets, which are readily available in shops.


Prepare the ground in autumn, digging in plenty of organic matter such as well rotted farm yard manure. The advantage of digging over the bed in autumn is that the winter frosts will break down any clods of soil. Choose a location that is well drained and in a sunny location. 

It is an advantage to have a onion bed that can be planted with onions every year as this will build up soil fertility and improve your onions.  It may be necessary once in a while to rotate the bed as this will encourage the build up of disease.  Check your onion harvest carefully every year and if the vigour of your onion starts to decline than move the bed the following year.

Onion sets can be planted as a main crop in February. Onions like a soil pH of  6 - 7.5, so if your soil is more acidic than that you will need to add lime to the soil. Firm the soil lightly by treading on the raked area and add a general fertiliser such as grow more. Water the ground if necessary prior to planting to achieve uniform soil conditions.

Plant onion sets about 10 cm apart in rows 30 cm apart. Use a trowel to plant the onion sets to a depth where the tips are just showing through the soil, as they may grow out of the soil if you just push them into the ground. Ensure the tips are mostly covered as they may be prey to birds otherwise.

You can feed your onions with a liquid feed of seaweed fertiliser if they require a boost. Onions are shallow rooted and do not compete well with weeds so ensure that the rows are well weeded in order to ensure they are not in competition for the soil nutrients. Weeding should always be done by hand near the base of the onion. Check the vigour of your onions for pest and diseases, and if they occur remove the affected soil and onion.  The soil can be treated with diluted jeyes fluid after harvesting to kill off any bacteria and fungus if required.

They will be ready to harvest in August/September depending on variety.  The onions are ready to harvest a few weeks after the foilage has started to to turn yellow and fall over.  Lift the onions on a dry day and move them to a suitable location to dry for 3-5 weeks. This will allow them to mature prior to using in the kitchen.

For related articles click onto:
Growing herbs
Growing rhubarb
Growing potatoes
Growing tomatoes
Growing tomatoes from seed
Harvesting potatoes
How to grow broccoli from seed
How to grow cauliflower from seed
How to grow garlic
How to build a cold frame
How to grow artichokes from seed
How to Grow Asparagus from Seed
How to grow cabbage from seed
How to grow carrots from seed
How to grow cucumbers from seed
How to grow french beans from seed
How to grow lettuce from seed
How to grow onions from onion sets
How to grow onions from seed
How to Grow Pumpkins from Seed
How to grow runner beans from seed
How to grow seeds indoors
How to grow strawberries from seed
How to grow tomatoes from seed
How to make compost
How to propagate using division
How to propagate from seed

Sunday 20 March 2011

HOW TO BUILD A COLD FRAME


Click here for the 'Seeds of Eaden' seed shop

Whilst it is advantageous to start seedlings of early indoors, it is frustrating if you do not have sufficient means to harden off the plants before planting outdoors. A cold frame is excellent for this purpose, providing protection for your young plants. Cold frames can be expensive to purchase but they are fairly simple to make for anyone with a basic understanding of DIY.  Your plants will appreciate your efforts.


Because a cold frame is unheated it acts as a transient stage between seedlings and planting outdoors. Place the cold frame in a sunny position, ideally south facing, if you wish to give young plants an early start in the spring. Ventilation is important within the cold frame, and the opening glass lid allows this to happen successfully.


In order to make your cold frame you will require wood for the sides, and a glass/perspex panel or window for the top. Common sizes for a cold frame are 75 cm wide x 20cm deep x 15 cm high, giving a growing space of two m2. However, the size of your cold frame will depend on what plants you are growing, how much space you have within your garden and what materials you are using so I have not gone into specific measurements here.


The cold frame slopes downwards from back to front, in order to increase amount of sunlight inside and to allow run off of rain water. To determine the size of your cold frame base, measure the size of your glass/perspex sheet after it has been framed in timber, or your windows. The size of your frame should allow this top to sit on the base securely. Build your base from slats of wood, ensuring that the back of the cold frame is 5cm higher than the front. Use screws to secure the slats into the corner pieces. You will need to cut the top slats on the side of the frame at an angle in order to accommodate this gentle lean. Secure the glass panel or windows to the frame, using hinges on one side to allow opening. If required, you can insulate your cold frame with polystyrene tiles.


For related articles click onto:
Drainage
Feeding plants
Garden sheds
Grass maintenance - laying turf
Grass maintenance - sowing a lawn from seed
How to build a cold frame
How to grow artichokes from rooted cuttings
How to grow seeds indoors
How to make compost
How to take a stem cutting
How to propagate from root cuttings
How to propagate from seed
Lawn care
Lawn grasses
Laying concrete
Manuring
Non-grass lawn
Paths - Brick paving
Preparing a seed bed
Soil structure
Vegetable crop rotation
Weeding

Thursday 17 March 2011

HOW TO GROW LETTUCE FROM SEED


Lettuce can be grown from seed either planted directly in the grown or grown indoors or under glass. The season for planting lettuce is long and if planted every few weeks from spring you will ensure a continuous crop of lettuce throughout the summer. 


Whether you choose to sow your seedlings outside or indoors, you will need to prepare the soil for planting in the same way.  Lettuce plants like a free draining, humus rich soil. During the autumn/winter start preparing the beds by digging them over and incorporating some well rotted farm yard manure or leaf mould. Rake the soil to a fine tilth a week before planting, incorporating a general fertiliser.


When planting spring lettuce outside directly into the soil wait until the worst of the frosts are over. It will take 6-14 weeks from planting to harvesting your lettuce, depending on variety. They like a sunny position but will benefit from being grown inside a small poly tunnel. Summer lettuce will benefit from being in a partially shaded area to prevent extremes of heat. Sow the seeds in 2cm deep drills, rows spaced 15cm apart. Thin seedlings when they are 5cm high, leaving 15-25 cm between each plant.  Sow successive seeds every few weeks to ensure a continuous crop of lettuce.


Lettuce can be sown indoors or in a heated greenhouse to give your seedlings a head start. Plant seedlings directly into individual cells or small pots. Use John Innes 'seed and potting' mix, settling the compost by tapping the side of the container. Sow several sees into each cell and cover lightly with compost and firm. Water gently and place in mini propagator in a bright, warm place, but out of direct sunlight. Open vents to ensure good ventilation.

Prick out seedlings when they are 5cm high.  Before planting your lettuce seedlings, you will have to harden them off for several weeks. Either place them in well lit, unheated room or place them outside in the day remembering to bring them in EVERY night. Do not place them outside if it is windy or below 6 degrees Celsius. You may wish to use a cold frame to harden plants off. Plant when the risk of frosts have passed.

For related articles click onto:
Growing herbs
Growing rhubarb
Growing potatoes
Growing tomatoes
Growing tomatoes from seed
Harvesting potatoes
How to grow broccoli from seed
How to grow cauliflower from seed
How to grow garlic
How to build a cold frame
How to grow artichokes from seed
How to Grow Asparagus from Seed
How to grow cabbage from seed
How to grow carrots from seed
How to grow cucumbers from seed
How to grow french beans from seed
How to grow lettuce from seed
How to grow onions from onion sets
How to grow onions from seed
How to Grow Pumpkins from Seed
How to grow runner beans from seed
How to grow seeds indoors
How to grow strawberries from seed
How to grow tomatoes from seed
How to make compost
How to propagate using division
How to propagate from seed

Saturday 12 March 2011

HOW TO GROW STRAWBERRIES FROM SEED


Click here for the 'Seeds of Eaden' seed shop

I love strawberries. The taste of home grown strawberries, eaten just after picking, takes me back to my childhood. There are many varieties of strawberry, and you will have to choose according to your taste or  the growing season you would prefer.

Strawberry plants need to be replaced every three years to ensure good crop, and although they can be propagated by layering plantlets they are also easy to raise from seed. Most strawberry plants will not grow true from seed as they are cultivated hybrids.  Species strawberries such as alpine strawberries or F1 cultivars will grow true from seed. The advantage of growing strawberries from seed is the quantity of plants you can raise and the diversity of plants grown. And yes, you can collect and sow your own strawberry seed.

Strawberries can be sown indoors or in a heated greenhouse during late February or March to give your seedlings a head start. Plant seeds onto a seed tray filled with John Innes 'seed and potting' mix, settling the compost by tapping the side of the container. Sow the seeds across the surface and cover lightly with compost.. Water gently and place in a cold frame, greenhouse or well lit room.  Germination will occur within 2-8 weeks.

Pot up the strawberry seedlings when they produce their third true leaves.  Transplant to 9cm pots, filled with John Innes No 1 or 2. are 5cm high.  Before planting your strawberry seedlings, you will have to harden them off for several weeks. You can either plant them out in their final position immediately or plant when they are larger in the autumn. Choose a position that is well drained and improve the soil by incorporating organic matter or farm yard manure.  Strawberries will fruit the following year.


For related articles click onto:
Growing herbs
Growing rhubarb
Growing potatoes
Growing tomatoes
Growing tomatoes from seed
Harvesting potatoes
How to grow broccoli from seed
How to grow cauliflower from seed
How to grow garlic
How to build a cold frame
How to grow artichokes from seed
How to Grow Asparagus from Seed
How to grow cabbage from seed
How to grow carrots from seed
How to grow cucumbers from seed
How to grow french beans from seed
How to grow lettuce from seed
How to grow onions from onion sets
How to grow onions from seed
How to Grow Pumpkins from Seed
How to grow runner beans from seed
How to grow seeds indoors
How to grow strawberries from seed
How to grow tomatoes from seed
How to make compost
How to propagate using division
How to propagate from seed